Key Takeaways
- Understanding Integration: Learn how to connect hardware synthesizers with your DAW effectively for enhanced creativity.
- Essential Tools: Explore the necessary equipment for a smooth integration, including MIDI and audio interfaces.
- Workflow Steps: Follow a detailed workflow from setup to recording, ensuring seamless synth performance.
- Software Synths: Discover the advantages of software synthesizers and how to integrate them alongside hardware for a hybrid approach.
- Live Performance Insights: Apply lessons from live setups to improve efficiency and creativity in the studio.
Call to Action
Stay updated with the latest insights and tips in electronic music production. Join our newsletter for exclusive content, tutorials, and more!
Table of Contents
- The Symbiotic Relationship: Why Integration Matters
- The Foundation: Essential Tools for Synth-DAW Integration
- Workflow Breakdown: Connecting and Recording Your Hardware Synth
- Software Synths: The Seamless Integration Experience
- The Hybrid Approach: Best of Both Worlds
- Tips from Live Performance and Studio Practice
- Overcoming Common Integration Challenges
- The Noxal Perspective: More Than Just Wires
- Join the Sonic Expedition
- FAQ
The Symbiotic Relationship: Why Integration Matters
For decades, the studio landscape has evolved. Once, entire rooms were dedicated to massive modular systems and multi-track tape machines. Today, a powerful laptop running a DAW can be a complete studio. Yet, the allure of physical synthesizers persists, and for good reason. They offer a tactile experience, unique sonic characteristics, and often, an inspiring workflow that can spark ideas in ways a mouse and keyboard simply can’t.
Integrating your hardware synths with your DAW creates a truly hybrid setup, a creative nexus where the hands-on immediacy of a physical instrument meets the powerful editing, arranging, and mixing capabilities of a modern software environment. This blend isn’t just convenient; it’s a profound catalyst for sound design innovation.
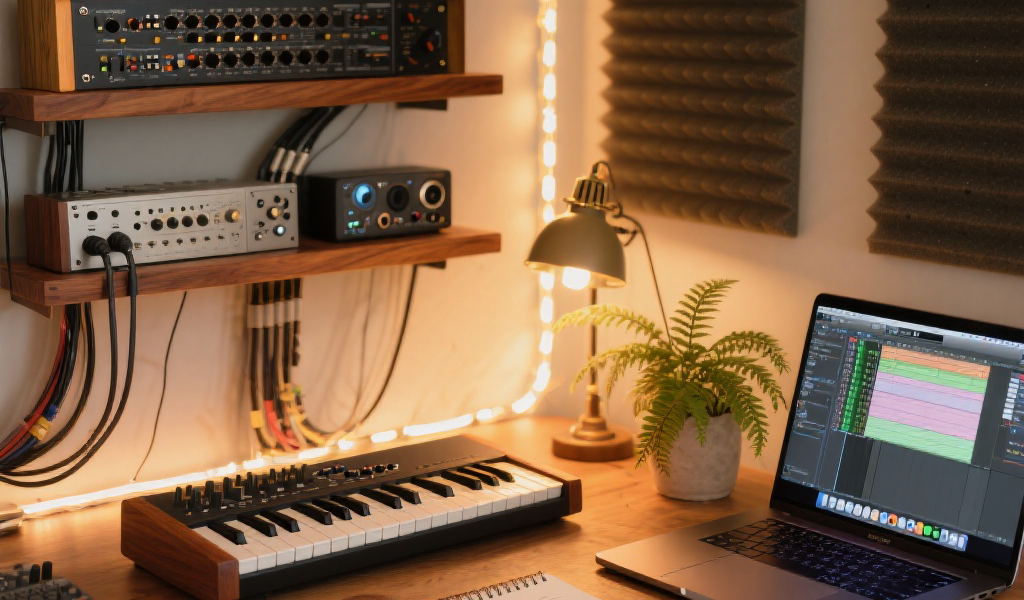
The Foundation: Essential Tools for Synth-DAW Integration
Before we dive into the nitty-gritty of recording and sequencing, let’s ensure we have the fundamental building blocks in place. Here are the essential tools that enable communication between your hardware synths and your DAW:
- MIDI Interface:
- What it is: MIDI (Musical Instrument Digital Interface) doesn’t transmit audio; it transmits performance data. Think of it as a language that tells your synth what to play, how to play it, and when to play it.
- How it connects: Most modern hardware synths have MIDI IN/OUT ports. Your computer likely doesn’t. A MIDI interface converts USB from your computer into MIDI DIN for your synths.
- The “Why”: Essential for sequencing your hardware synth from your DAW.
- Noxal Note: Some newer synths use USB-MIDI directly.
- Audio Interface:
- What it is: Converts the analog audio signal from your synth into a digital signal for your computer, and vice-versa for playback.
- How it connects: Connect the synth’s audio outputs to the inputs of your audio interface.
- The “Why”: Crucial for capturing the actual sound of your synth.
- Personal Insight: Invest in a quality audio interface; it’s the gateway for all your sounds.
- Cables:
- MIDI Cables: Standard 5-pin DIN cables for MIDI connections.
- Audio Cables:
- TS Cables: Unbalanced 1/4″ cables for instrument signals.
- TRS Cables: Balanced 1/4″ cables ideal for longer runs.
- XLR Cables: Balanced cables, usually for microphones.
- USB Cables: For USB-MIDI or direct USB connections.
Workflow Breakdown: Connecting and Recording Your Hardware Synth
Now that we have our tools, let’s outline a typical workflow for getting your hardware synth playing and recorded in your DAW. This section is all about the practical, hands-on steps that lead to a truly creative and efficient studio session.
Step 1: Physical Connection
- MIDI Connection:
- Connect a MIDI OUT cable from your MIDI interface to the MIDI IN port of your synthesizer.
- (Optional for recording knob tweaks): Connect a MIDI OUT cable from your synth’s MIDI OUT to the MIDI IN of your interface.
- Audio Connection:
- Connect the audio outputs of your hardware synth to the line inputs of your audio interface using appropriate cables.
Step 2: DAW Configuration – The Digital Handshake
- Configure MIDI Devices:
- Open your DAW’s preferences/settings and ensure your MIDI interface is recognized and enabled.
- Enable MIDI clock sync output to your synth’s MIDI port to sync arpeggiator/sequencer.
- Create an External Instrument Track:
- Many DAWs have dedicated “External Instrument” tracks for consolidated MIDI and audio routing.
- Select the MIDI output and audio input for the external instrument track.
Step 3: Monitoring and Latency Management
- Direct Monitoring (Preferred): Use direct monitoring to hear input signals without latency.
- DAW Input Monitoring: Ensure your audio buffer size is optimized for performance.
Step 4: Recording Your Performance
- Arm your MIDI and audio tracks for recording.
- Hit record and play your synth, capturing both MIDI and audio.
- Record knob and fader movements via MIDI automation to add dynamism to your parts.
Software Synths: The Seamless Integration Experience
While hardware synths offer a distinct appeal, software synthesizers represent an equally powerful and convenient universe of sound.
- Virtual Instrument Tracks: Software synths are loaded directly as virtual instruments.
- Automatic Routing: MIDI from your controller automatically routes to the software synth.
- Total Recall: Every parameter setting is saved within your DAW project for easy access.
- Deep Automation: Automate virtually any parameter with precision.
The Hybrid Approach: Best of Both Worlds
The ultimate studio setup combines hardware and software, leveraging their unique strengths:
- Hardware for Foundation, Software for Layers: Use hardware synths for main elements and software synths for detailing layers.
- External Processing: Send audio through external effects and back into the DAW for unique processing.
- Sampling Hardware: Record from hardware synths and manipulate them in your DAW’s sampler.
Tips from Live Performance and Studio Practice
- Template Creation: Create a DAW template with synths configured for quick starts.
- MIDI Mapping for Control: Map crucial synth parameters to a MIDI controller.
- Patch Management: Keep meticulous records of your hardware patches for easy access.
- Embrace Creative Constraints: Limit tools to spark more focused creativity.
Overcoming Common Integration Challenges
- Latency: Use direct monitoring and optimize your DAW’s audio buffer.
- MIDI Clock Sync Issues: Ensure MIDI clock output is enabled for your synth.
- Gain Staging: Adjust synth output and input gain on your audio interface for clean levels.
- Ground Loops/Noise: Plug all gear into the same power outlet to solve hum issues.
The Noxal Perspective: More Than Just Wires
Integrating synthesizers with DAWs isn’t just a technical task; it’s an extension of your creative self. It bridges the world of hardware and software, enhancing your creative process.
Mastering this integration opens up new avenues for sound design, fostering a robust, personal electronic music production experience.
Join the Sonic Expedition
We hope this deep dive into integrating synths with DAWs has armed you with the knowledge to refine your workflow. Every connection you make enhances your unique sonic signature.
At Noxal, we are always exploring and pushing boundaries in synthesizer use and production. Join our community of passionate electronic music producers!
FAQ
Q: What synth-DAW integration tips do you recommend for beginners?
A: Start with a MIDI interface and an audio interface. Creating a simple DAW template can also help streamline your workflow.
Q: Is it better to use hardware or software synthesizers?
A: It depends on your goals! Hardware offers tactile, sonic richness, while software provides convenience and flexibility.
Q: How can I overcome latency issues when using synths?
A: Utilize direct monitoring if available, and adjust your DAW’s audio buffer size for optimal performance.
Q: Do I need to manage patches for my hardware synth?
A: Yes, keeping track of your patches makes it easier to revisit sounds, especially after recording!